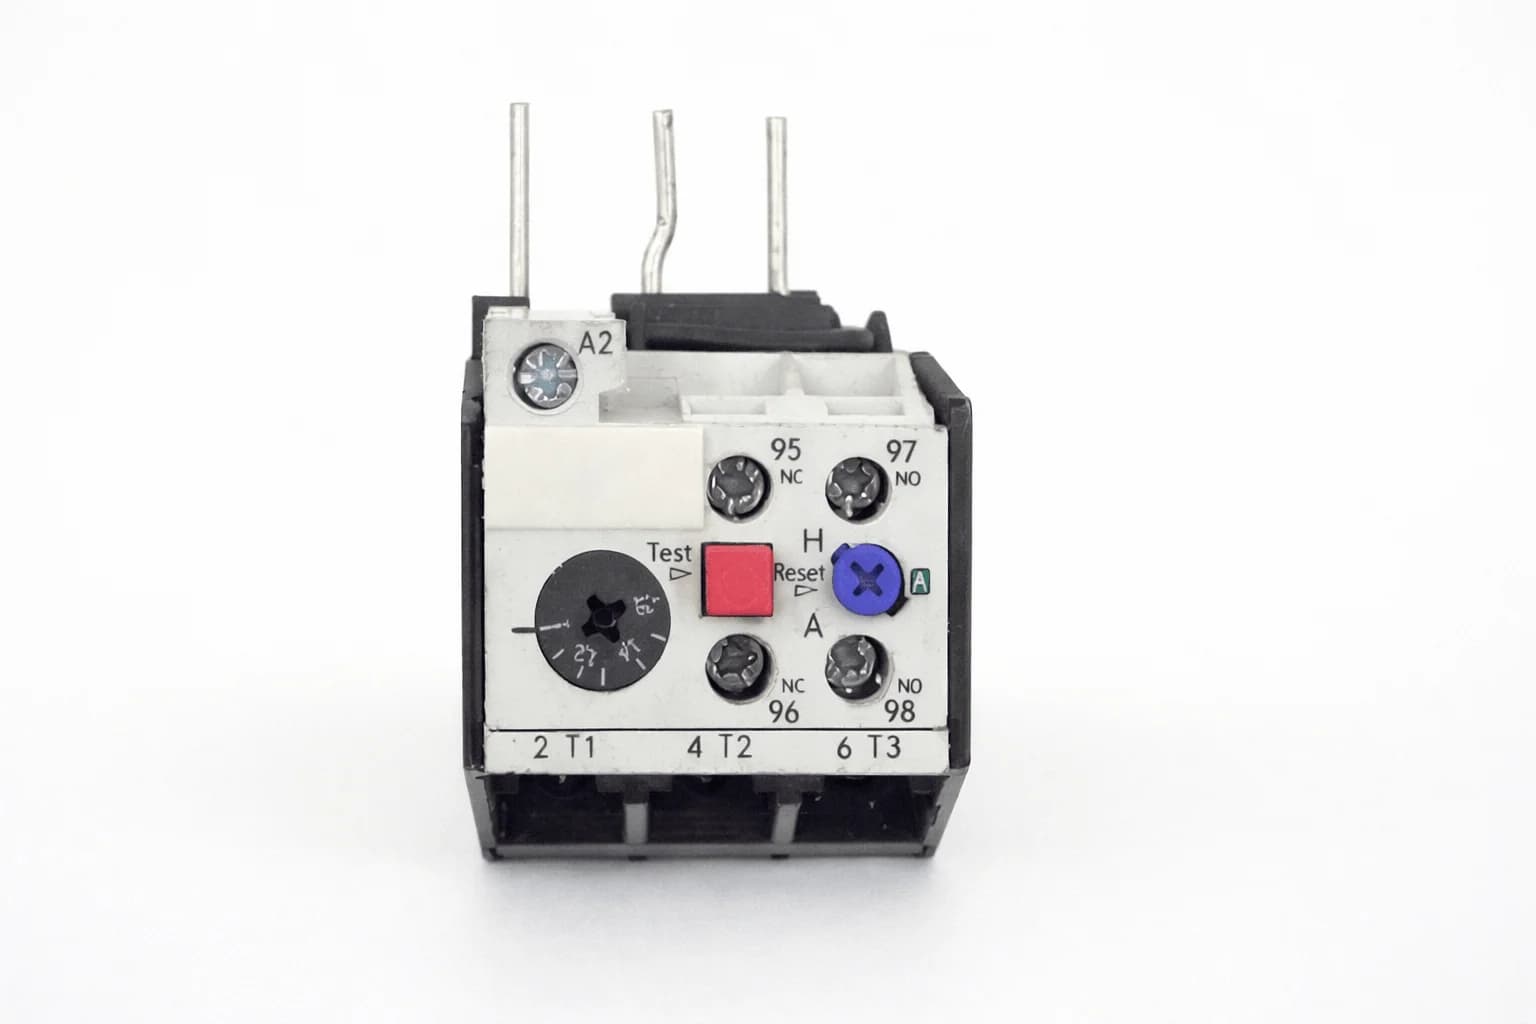
An overload relay that keeps tripping is usually reporting a real overcurrent, so the first job is to find the cause, not to raise the setting. Check five things in order: the relay’s current setting against the motor nameplate full-load current, the wiring and terminations, the heat around the relay, the current in all three phases, and the starting duty and load. Replace the relay only when those checks come back clean and it still trips, will not reset, or shows heat damage.
Quick answer: five overload relay checks, in order
- Setting. Compare the dial on the relay with the full-load current on the motor nameplate. A setting below the nameplate current trips a healthy motor.
- Wiring and terminations. Look for loose, corroded or discoloured terminals at the relay, the contactor and the motor. A hot connection puts heat into the relay.
- Heat around the relay. Check the temperature inside the enclosure, blocked vents, failed panel fans and hot devices mounted next to the relay.
- Phase currents. Measure current in all three motor leads while the motor runs. A missing or low phase points to a supply, fuse or contact problem.
- Starting duty and load. Count the starts per hour, time the acceleration, and check the driven machine for binding, bad bearings or a process change.
What an overload relay does in a motor starter
An overload relay sits between the contactor and the motor. It watches the motor current and opens a control contact when the current stays above its setting for too long. That contact is wired in series with the contactor coil, so the contactor drops out and the motor stops. The delay is deliberate: it lets the motor draw its normal starting current without tripping, and it shortens as the overcurrent grows.
The relay does not clear short circuits. Fuses or a circuit breaker upstream do that. If the fuses blow or the breaker opens, the fault is somewhere other than a simple overload, and the overload relay is not the part to look at first.
Overload relay trips at start
A trip during acceleration means the motor is drawing starting current for longer than the relay allows.
- Read the setting first. If someone turned the dial down, or the motor was changed for a larger one, the setting may no longer match the nameplate full-load current.
- Time the start. A high-inertia load such as a large fan, a loaded conveyor or a centrifuge can take long enough to reach speed that a standard relay trips. If the acceleration time has grown, look at the load before the relay.
- Check the supply voltage at the starter during the start. Low voltage stretches the acceleration time and raises the current drawn.
- Uncouple the motor if the machine allows it. A motor that starts cleanly uncoupled points to the driven load: a jammed pump, a seized bearing, a belt that is too tight.
- On a reduced-voltage starter such as wye-delta, confirm where the relay sits in the circuit and set it to the starter documentation. The current through the relay may not be the line current.
Overload relay trips under load
A trip after the motor has run for minutes or hours usually means the motor really is carrying more current than the setting.
- Measure the running current in each of the three motor leads and compare it with the nameplate full-load current and with the relay setting.
- If the current is above the nameplate value, the motor is overloaded. Look for a process change, a worn or fouled pump, a misaligned coupling, dry bearings or a clogged filter. The relay is doing its job.
- If the current is at or below the nameplate value and the relay still trips, check that the relay’s adjustable range actually includes the motor’s full-load current and that the dial is set to it.
- Check the supply voltage. Voltage that is well below the motor rating raises the running current for the same load.
Overload relay trips at random
Trips with no pattern, on a motor whose current looks normal when you measure it, are usually heat or a phase problem that comes and goes.
Ambient temperature and ventilation
Overload relays that work by heat respond to their surroundings as well as to motor current. A hot enclosure, a failed panel fan, direct sun on the cabinet or a drive mounted just below the relay can all bring the trip point down. Compare the trips with the time of day and the season. Check the relay manufacturer’s data for its ambient temperature limits before you conclude that the relay is faulty.
Loose or overheated terminations
A loose power terminal heats under load and conducts that heat into the relay. With the starter isolated, check every power connection on the relay and contactor for tightness, discolouration and damaged insulation. Use the conductor size the terminal is designed for.
Phase loss and imbalance
A motor that loses one phase keeps running on the other two and draws much more current in them. Unequal phase voltages have a similar, smaller effect. Compare the three line currents and the three phase-to-phase voltages at the starter. A large difference between phases points to a blown fuse, a failing supply connection, or a contactor pole with worn contacts. If the contactor contacts are the cause, see how to tell when a contactor needs a new contact kit.
Starting duty
Each start heats the motor and the relay. Frequent starts, jogging or plugging can add up to a trip even though the running current is normal. Count the starts per hour and compare with what the motor and starter were selected for.
Overload relay will not reset
- Wait. A relay that has just tripped needs time to cool before it will reset. Pressing the button harder does not help.
- Check the reset mode if the relay has a manual and automatic selector, and press the reset button fully in manual mode.
- Find out whether the relay or the control circuit is the problem. With power isolated and verified off, check continuity through the relay’s normally closed control contact after reset. If the contact is closed and the contactor still will not pull in, the fault is in the control circuit or the coil.
- Look for physical damage: a cracked case, a reset button that sticks or does not latch, melted plastic or burn marks near the power terminals.
- If the relay has cooled, shows no continuity through its control contact and will not latch, replace it.
When to replace the overload relay
Replace the relay when the cause is the relay itself and not the motor, the load or the installation:
- It trips with measured current in all three phases below its setting, in a normal ambient temperature, with tight terminations.
- It will not reset after cooling, or the reset button does not latch.
- The case, terminals or dial show heat damage, cracks or corrosion.
- It did not trip during a confirmed overload that damaged the motor.
- The motor was changed and its full-load current is now outside the relay’s adjustable range.
Overload relays are replaced as complete units. Do not open one to adjust or repair it, and do not bridge the control contact to keep a motor running.
How to choose a replacement overload relay
Two things decide the part number: the contactor the relay mounts on, and the current range.
- Start with the contactor. Read the contactor part number from its label. Each overload relay type is built to mount on particular contactor frames, so a relay with the right current range can still be the wrong part.
- Then pick the current range. Choose the range that includes the motor nameplate full-load current. Where two ranges overlap, either one covers the motor.
- Match the old relay’s part number where you can. If the label is readable, the simplest route is a like-for-like replacement of that exact number.
- Set the dial after fitting. Set the new relay to the motor nameplate full-load current and the relay instructions, not to wherever the old dial happened to be.
The BRAH catalogue lists 170 replacement overload relays: 129 type B3UA relays that replace Siemens 3UA relays for 3TF World Series contactors, 27 type BLR2D relays that replace Telemecanique LR2D relays for TeSys D contactors, and 14 type BLR2K relays that replace Telemecanique LR2K relays for TeSys K contactors. Current ranges run from 0.1 to 0.16 A up to 400 to 630 A. Each catalogue description lists a manual reset button and says the relay is supplied as an assembled unit, complete with wiring connectors and terminals. The BRAH part number is the OEM number with a B in front, so a 3UA55-00-0G is replaced by a B3UA55-00-0G.
BRAH overload relay types, contactors and current ranges
Find the row whose contactor list includes your contactor, then open the listing and pick the current range that includes your motor’s full-load current.
| BRAH type | Replaces | Contactors named in the catalogue description | Parts | Lowest current range | Highest current range |
|---|---|---|---|---|---|
| B3UA50 | Siemens 3UA50 (World Series) | 3TF30, 3TF31, 3TF40, 3TF41, 3TB40, 3TB41 | 17 | B3UA50-00-0A: 0.1 to 0.16 A | B3UA50-00-2S: 10 to 14.5 A |
| B3UA52 | Siemens 3UA52 (World Series) | 3TF32, 3TF33, 3TF42, 3TF43, 3TF44, 3TB42, 3TB43, 3TB44 | 19 | B3UA52-00-0A: 0.1 to 0.16 A | B3UA52-00-2C: 16 to 25 A |
| B3UA54 | Siemens 3UA54 (World Series) | 3TF44, 3TB44 | 7 | B3UA54-00-1G: 4 to 6.3 A | B3UA54-00-2Q: 25 to 36 A |
| B3UA55 | Siemens 3UA55 (World Series) | 3TF34, 3TF35, 3TF44, 3TF45 | 23 | B3UA55-00-0A: 0.1 to 0.16 A | B3UA55-00-8M: 36 to 45 A |
| B3UA58 | Siemens 3UA58 (World Series) | 3TF46, 3TF47, 3TF48, 3TF49 | 12 | B3UA58-00-1G: 4 to 6.3 A | B3UA58-00-8W: 70 to 88 A |
| B3UA59 | Siemens 3UA59 (World Series) | 3TF30, 3TF31, 3TF32, 3TF33, 3TF34, 3TF35, 3TF40, 3TF41, 3TF42, 3TF43, 3TF44, 3TF45, 3TF46 | 24 | B3UA59-00-0A: 0.1 to 0.16 A | B3UA59-00-2P: 50 to 63 A |
| B3UA60 | Siemens 3UA60 (World Series) | 3TF49, 3TF50, 3TB50 | 6 | B3UA60-00-2H: 55 to 80 A | B3UA60-00-3J: 110 to 135 A |
| B3UA61 | Siemens 3UA61 (World Series) | 3TF51 | 6 | B3UA61-00-2H: 55 to 80 A | B3UA61-00-3K: 120 to 150 A |
| B3UA62 | Siemens 3UA62 (World Series) | 3TF52, 3TF53, 3TB52 | 8 | B3UA62-00-2H: 55 to 80 A | B3UA62-00-3M: 150 to 180 A |
| B3UA66 | Siemens 3UA66 (World Series) | 3TF54, 3TF55, 3TF56, 3TF57 | 5 | B3UA66-00-2K: 80 to 125 A | B3UA66-00-3E: 250 to 400 A |
| B3UA68 | Siemens 3UA68 (World Series) | 3TF57, 3TF68 | 2 | B3UA68-00-3F: 320 to 500 A | B3UA68-00-3G: 400 to 630 A |
| BLR2D13 | Telemecanique LR2D13 (TeSys D) | LC1D09, LC1D12, LC1D18, LC1D25, LC1D32, LC2D09, LC2D12, LC2D18, LC2D25, LC2D32 | 15 | BLR2D1301: 0.1 to 0.16 A | BLR2D1322: 17 to 25 A |
| BLR2D23 | Telemecanique LR2D23 (TeSys D) | LC1D25, LC1D32, LC2D25, LC2D32 | 2 | BLR2D2353: 23 to 32 A | BLR2D2355: 30 to 40 A |
| BLR2D33 | Telemecanique LR2D33 (TeSys D) | LC1D40, LC1D50, LC1D65, LC1D80, LC1D95, LC2D40, LC2D50, LC2D65, LC2D80, LC2D95 | 2 | BLR2D3353: 23 to 32 A | BLR2D3355: 30 to 40 A |
| BLR2D33 | Telemecanique LR2D33 (TeSys D) | LC1D50, LC1D65, LC1D80, LC1D95, LC2D50, LC2D65, LC2D80, LC2D95 | 2 | BLR2D3357: 37 to 50 A | BLR2D3359: 48 to 65 A |
| BLR2D33 | Telemecanique LR2D33 (TeSys D) | LC1D65, LC1D80, LC1D95, LC2D65, LC2D80, LC2D95 | 3 | BLR2D3361: 55 to 70 A | BLR2D3365: 80 to 93 A |
| BLR2D43 | Telemecanique LR2D43 (TeSys D) | LC1D115, LC1D150, LC2D115, LC2D150 | 3 | BLR2D4365: 80 to 104 A | BLR2D4369: 110 to 140 A |
| BLR2K03 | Telemecanique LR2K03 (TeSys K) | LC1K06, LC1K09, LC1K12, LC2K06, LC2K09, LC2K12 | 14 | BLR2K0301: 0.1 to 0.16 A | BLR2K0322: 12 to 16 A |
The contactor list in each row is the one printed in the catalogue description for that series. A few individual parts list a different set of contactors than the rest of their series, so confirm the contactor on the product page of the exact part before ordering. Examples: the B3UA55-00-0G (0.4 to 0.63 A), the BLR2D1322 (17 to 25 A) and the BLR2K0322 (12 to 16 A).
For more on each family, see the guide to replacing Siemens 3UA overload relays and the guide to pairing an overload relay with an LC1D5011 contactor.
Before you order
- The contactor part number, read from the contactor itself.
- The old relay’s part number and current range, if the label is readable.
- The motor nameplate full-load current and voltage.
- Whether the motor was replaced since the starter was built. If it was, the old relay’s range may no longer be right.
- Any auxiliary wiring on the old relay, so the control circuit goes back the same way.
BRAH Electric is an aftermarket manufacturer and is not an authorized distributor of Siemens or Telemecanique. BRAH parts carry a 2-year warranty from the date of invoice, and in-stock orders placed before 3:00 PM Pacific ship the same business day. If you are unsure which relay fits, call (855) 355-2724, Monday to Friday, 6AM to 5PM Pacific, with the contactor and relay part numbers.
Safety when testing or replacing an overload relay
A tripping overload relay is doing its job. Find the cause before you raise the setting, and never set the relay above what the motor nameplate and the applicable code allow just to stop the trips. Before touching terminals or removing the relay, de-energise the starter, apply lockout/tagout, and verify the absence of voltage with a tested meter. Remember that control circuits can be fed from a separate source. Current measurements on a running motor are live work and call for the right protective equipment. All of this work is for qualified personnel following the site’s electrical safety procedures.
Overload relay FAQs
Why does my overload relay keep tripping when the motor load looks normal?
Measure the current in all three phases before trusting “looks normal”. If the current really is below the setting, check that the setting matches the nameplate full-load current, then look for heat: a hot enclosure, a loose termination or frequent starts. If all of those are ruled out, replace the relay.
Can I turn the overload setting up to stop nuisance trips?
Only if the setting is below the motor nameplate full-load current. Set it to the nameplate value and the relay instructions. Raising it beyond that removes the protection the motor depends on and hides the fault that is causing the trips.
How do I know whether the relay or the motor is the problem?
Use the measured current. Current above the nameplate value means the motor or the load is the problem. Current below the setting in all three phases, with normal temperature and tight connections, points to the relay.
Can an overload relay fail without visible damage?
Yes. A relay can drift or stop latching with nothing to see on the outside. That is why the diagnosis rests on measured current and a continuity check of the control contact, not on appearance.
References
- OSHA 29 CFR 1910.147, The control of hazardous energy (lockout/tagout): the US regulation for isolating and locking out equipment before servicing.
- NFPA 70E, Standard for Electrical Safety in the Workplace: work practices for establishing an electrically safe work condition and for energised testing.
- NFPA 70, National Electrical Code: installation requirements for motor circuits, including motor overload protection.
- IEC 60947-4-1, Contactors and motor-starters: the international product standard for electromechanical contactors and motor starters.


